Why Grow Spinach Indoors?
Growing spinach indoors solves a problem many gardeners face: the outdoor season is short, temperatures bolt the plants before maturity, and you can't harvest fresh greens in winter. Indoor spinach flips this on its head. You get fresh, pesticide-free spinach year-round, complete control over growing conditions, and harvests that actually extend your supply rather than racing against the calendar.
The benefits stack up quickly:
- Year-round supply. Outdoor spinach is a spring and fall crop in most climates. Indoors, you ignore seasons entirely and harvest continuously.
- No bolting surprises. Spinach bolts (flowers and becomes inedible) when temperatures exceed 80°F or days grow too long. Indoors, you control the temperature to a cool 50–70°F and light duration, keeping plants in their productive vegetative phase indefinitely.
- Pesticide-free production. No outdoor pests, no soil-borne diseases, no need for chemical treatments. Just fresh, clean spinach.
- Space efficiency. A single shelf with lights can yield weeks of harvests in a footprint smaller than a bookcase.
- Continuous harvesting. Unlike outdoor spinach, which you harvest all at once before bolting, indoor spinach lets you pick outer leaves repeatedly and watch the plant regrow for successive harvests.
Best Spinach Varieties for Indoor Growing
Not all spinach varieties perform equally indoors. Choose fast-maturing, bolt-resistant types designed to thrive under controlled conditions.
- Bloomsdale Longstanding. The classic choice for indoor growing. It produces thick, deeply crinkled dark green leaves and resists bolting longer than standard varieties. Harvest in 40–50 days from transplant.
- Renegade. A hybrid bred for heat and bolt resistance, this variety is also mildew-resistant, making it ideal for indoor humidity. Reaches maturity in 45–55 days.
- Baby Leaf Varieties. Fast-growing and ideal for continuous harvesting. Varieties like 'Bloomsdale' bred for baby-leaf production (marketed as Purely Organic Heirloom Spinach seeds) can be harvested at 25–30 days or left to mature at 40–50 days.
The key is choosing varieties explicitly labeled "slow-bolt" or "bolt-resistant" when shopping for seeds. Standard outdoor varieties will bolt more aggressively under indoor lights.
Light: The Most Critical Factor
Spinach needs 12–14 hours of light daily to grow well. This is non-negotiable. Without sufficient light, plants stretch, produce weak leaves, and bolt prematurely. (You can extend to 16 hours if needed, but 12–14 is the standard recommendation.)
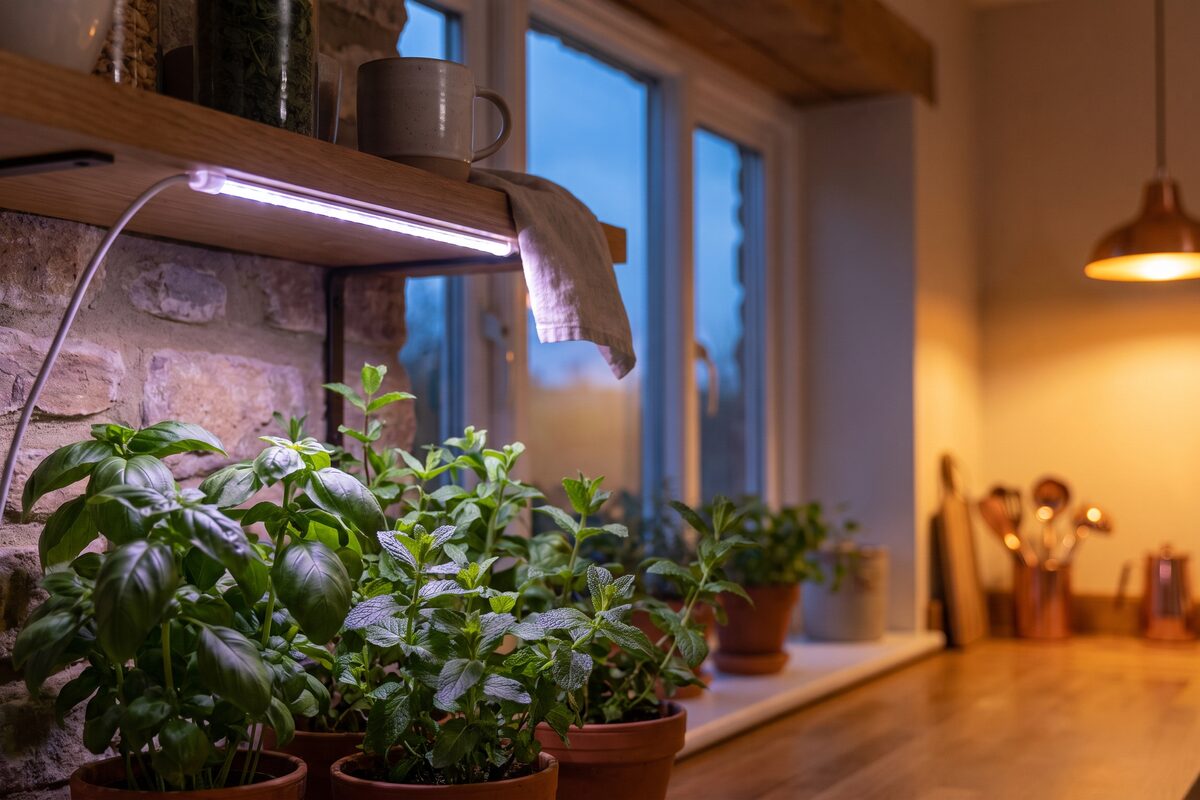
LED grow lights are the standard for indoor spinach. They're energy-efficient, produce the right light spectrum for vegetative growth, and run cool enough to fit on shelves without overheating plants.
T5 fluorescent strips are also effective and often more budget-friendly. The Barrina T5 LED Grow Light Strips 4-Pack are an excellent choice—they deliver 6500K daylight spectrum perfect for leafy greens, mount easily above containers, and run about 24 watts for a 2-foot strip. Position them 6–12 inches above seedlings, raising as plants grow. A 2-foot strip covers roughly a 2-foot × 2-foot growing area.
For a more affordable entry point, the GooingTop LED Clip-On Grow Light works well for smaller setups. It clips to a shelf, adjusts the angle, and covers about 1–2 square feet. It's ideal if you're starting with just one or two containers and want to test the system before committing to full shelving.
Set a timer to 12–14 hours on, 10–12 hours off. Spinach doesn't need a perfect photoperiod and actually grows better with some darkness. A programmable timer prevents the error of leaving lights on 24/7, which wastes electricity and can stress plants.
Temperature and Humidity: Staying Cool
Spinach's ideal temperature range is 50–70°F, with 60–65°F being optimal. This is the key to preventing bolting. Above 75°F, even bolt-resistant varieties start showing signs of flowering.
Your advantage indoors: Most home environments sit naturally in this range, especially basements or cool rooms. If your growing area runs warmer (above 72°F consistently), move it to a cooler location or run a small fan to cool the space.
Humidity should sit between 50–60%. This prevents both drought stress and fungal disease. Most homes naturally sit in this range. If humidity creeps above 70%, ensure good air circulation with a small oscillating fan—just point it across your plants, not directly at them, to avoid damaging leaves while still preventing mold.
Soil vs. Hydroponic: Which Method?
Both methods work for spinach. Choose based on your experience level and space.
Soil Method: Simpler and Forgiving
Best for beginners. Soil buffers watering mistakes, and mistakes won't crash your entire system overnight.
Use a quality seed-starting or potting mix like Espoma AP4 Organic Potting Mix. It's loose, well-draining, and doesn't compact over time. Fill containers at least 6–8 inches deep.
Watering frequency: Water when the top inch of soil feels dry. Indoor spinach in pots typically needs watering every 2–3 days, depending on humidity and pot size. Overwatering is the #1 killer of indoor spinach—it leads to root rot and fungal disease.
A XLUX Soil Moisture Sensor Meter removes guesswork. Stick it into the soil; when it reads below 4, water thoroughly until it drains from the bottom, then let it dry slightly before watering again. This tool pays for itself in a few prevented overwatering incidents.
Container size: Use 4–6 inch pots for full-sized plants, or wider, shallower trays for baby-leaf harvesting. Self-watering planters like the Lechuza model reduce watering frequency and are excellent for busy growers, though they cost more upfront.
Feeding: Spinach is a heavy feeder. Start with nutrient-rich potting soil, then fertilize every 2 weeks with a balanced, water-soluble fertilizer once plants have true leaves. Look for a formula with higher nitrogen (the first number in N-P-K ratios), like a 10-5-5 or 12-4-8.
Hydroponic Method: Faster Growth, Higher Yields
Best for intermediate growers. Hydroponic spinach grows 20–30% faster than soil and yields more leaves per plant. But systems require more monitoring and setup.
In hydroponics, roots sit in nutrient solution instead of soil. Common beginner-friendly systems include deep-water culture (DWC), where roots hang in an aerated tank, or NFT (nutrient film technique), where a thin film of nutrient solution flows over roots in a channel.
pH is critical. Hydroponic spinach thrives at pH 5.5–6.5. Use a General Hydroponics pH Control Test Kit to check weekly. Most hydroponic nutrient solutions maintain pH automatically, but drift happens.
Nutrient solution: Use a complete hydroponic nutrient solution like General Hydroponics FloraDuo Nutrient (1 Quart), designed for leafy greens. FloraDuo is a two-part solution that mixes easily and maintains proper nutrient balance. Follow the package instructions for spinach (typically 1.4 EC or about 700 ppm total dissolved solids).
Why FloraDuo for spinach? Spinach requires high nitrogen (about 191 mg N per plant over 15 days of growth in research trials), and FloraDuo's N-P-K ratio is optimized for vegetative growth. The formulation also includes calcium and magnesium in the right proportions, preventing deficiency symptoms.
Aeration is essential. Roots need oxygen. Use an aquarium air pump (cheap and widely available) to bubble air through the nutrient tank. Without aeration, roots rot and plants fail within days.
Change the nutrient solution every 3 weeks to prevent salt buildup and maintain nutrient balance.
Seed Starting: The First Step
Whether soil or hydroponic, you'll start with seeds. Seeds can be started directly in your final growing medium, but germination is more reliable in a controlled environment.
Seed Starting Method:
- Use MIXC 10-Pack Humidity Dome with 1020 Trays. The dome holds humidity, critical for germination. Fill with a seed-starting mix (finer than potting soil).
- Plant seeds ¼ inch deep, one per cell or 2 inches apart in trays. Keep soil consistently moist (not waterlogged) during germination.
- Temperature: 60–70°F is fine; seeds will germinate in 5–10 days. A heat mat speeds germination to 3–5 days but isn't required.
- Once sprouted: Remove the dome immediately. Lower lights to 2–3 inches above seedlings and keep them on for 12–14 hours daily. This prevents stretching and produces compact, sturdy plants.
- When true leaves appear (the second set of leaves, which look like actual spinach leaves): Begin fertilizing at half strength if soil-growing, or prepare to transplant to your hydroponic system.
- Transplanting: Move seedlings to their final containers when they have 3–4 true leaves (usually 4–5 weeks old).
For hydroponic systems: Transition seedlings to rockwool. Rockwool Grow Cubes 1.5" (30 Pack) are sterile, provide excellent root-to-water contact, and are designed for hydroponic crops. Pop the seedling into a cube hole and place the cube in your system's net pot or growing channel.
Watering and Nutrients: The Ongoing Rhythm
Proper watering and feeding separate thriving spinach from struggling spinach.
Soil-grown spinach:
- Water every 2–3 days when the top inch is dry.
- Provide consistent moisture; inconsistent watering encourages bolting.
- Mulch the soil surface with ½ inch of compost to retain moisture and moderate temperature.
- Fertilize every 2 weeks with a balanced liquid fertilizer once plants have true leaves.
Hydroponic spinach:
- Check pH and EC (electrical conductivity, a measure of nutrient concentration) weekly.
- Top up the tank with distilled water as plants transpire and consume water (solution level drops).
- If pH drifts below 5.5, add pH Up; if above 6.5, add pH Down.
- If EC drops below 1.2, add more concentrated nutrient solution or mix fresh solution.
- Change the reservoir every 3 weeks.
Harvesting for Continuous Supply
This is where indoor spinach shines. Unlike outdoor spinach, which you harvest all at once, indoor spinach can be harvested repeatedly.
Baby-leaf harvest (25–35 days): Pick individual outer leaves once the plant has 4–6 true leaves. Use scissors and snip leaves ½ inch above the soil. The plant regrows from the center and produces another flush in 10–14 days. You can harvest the same plant 3–4 times before it exhausts itself or bolts.
Full-size harvest (40–50 days): Let plants grow until the entire crown is mature. Harvest the whole plant by cutting at soil level, then replant the container with new seeds. Alternatively, harvest outer leaves every few days and let the center continue growing until bolting begins.
Continuous succession planting: Plant new seeds every 2 weeks. When the first crop is harvested, a second crop is already growing. You'll have fresh spinach weekly without gaps.
Common Mistakes and How to Avoid Them
- Overwatering. The #1 killer. Soil should be moist but not waterlogged. If soil stays wet for more than 2–3 days, root rot sets in. Use a moisture meter if you're unsure.
- Insufficient light. Spinach needs 12–16 hours daily. Fewer than 12 hours and plants stretch, weaken, and bolt faster. Measure distance from lights to leaves—6–12 inches is the sweet spot.
- Too warm. Above 70°F consistently, bolting accelerates. Keep growing areas cool, ideally 60–68°F. If your space runs warm, move the setup to a basement, cooler room, or use a fan to circulate air and drop temperature by a few degrees.
- Crowding. Packed plants share air, raising humidity and inviting mold. Space containers so leaves don't touch. Ensure a small fan circulates air gently across plants.
- Poor air circulation. Stagnant air breeds powdery mildew and damping-off disease (fungal attack on seedlings). Use a small oscillating fan on low speed, pointing across (not directly at) plants for as long as lights are on.
Troubleshooting: When Things Go Wrong
Yellowing lower leaves
Usually indicates nitrogen deficiency. Fertilize more frequently (weekly instead of bi-weekly) or increase fertilizer concentration slightly. In hydroponics, check EC and top up nutrients.
Slow growth, pale leaves, stunted appearance
Likely insufficient light or nutrients. Move lights closer (down to 4–6 inches from seedlings) and verify 14 hours daily. Increase fertilizer frequency.
Bolting (flowering, bitter leaves)
Temperature too high or plant too old. Check your room temperature—if above 72°F, cool the space. Harvest immediately before it flowers, or start a new crop. If growing the same plant longer than 50 days, bolting is natural and can't be stopped.
White powder on leaves (powdery mildew)
Humidity too high or air circulation poor. Drop humidity below 60% by venting the space or running a dehumidifier. Increase fan speed. Remove affected leaves. Prevent future cases by ensuring 12+ inches between plants and constant air movement.
Damping-off (seedlings collapse at soil line)
Soil too wet during germination or poor air circulation. Let soil dry slightly between waterings. Increase air circulation. Remove the seed tray dome once sprouts appear.
Yellow or purple-tinged leaves in hydroponics
pH drift. Test and adjust to 5.5–6.5. Purple tips can also indicate phosphorus deficiency or cold stress—ensure temps stay above 60°F and nutrient solution EC is at target.
Growing Beyond One Crop
Once you master the basics, expand your setup:
- Add shelving: A 3-tier metal shelving unit with LED strips on each tier can hold 8–12 containers and produce pounds of spinach monthly.
- Automate watering: Self-watering containers or drip irrigation timers reduce daily maintenance.
- Stagger plantings: Rather than one big harvest, plant new seeds every 2 weeks for a perpetual supply.
- Experiment with varieties: Once Bloomsdale succeeds, try Renegade or Space for comparison.
The Bottom Line
Indoor spinach is one of the easiest vegetables to grow year-round. The barrier isn't complexity—it's consistency. Spinach asks for:
- 12–14 hours of light daily (non-negotiable)
- Temperature between 50–70°F (natural for most homes)
- Consistent moisture without overwatering
- Decent air circulation
- Basic feeding every 2 weeks
Get those right, and you'll harvest fresh, crisp spinach week after week. Whether you choose the simplicity of soil or the precision of hydroponics, indoor spinach pays back every bit of attention you give it in taste, nutrition, and the quiet satisfaction of knowing exactly where your food came from.
Summary checklist for success:
- Set up lights on a 12–14 hour timer
- Choose Bloomsdale or Renegade varieties
- Water when soil is dry 1 inch down (use a moisture meter)
- Keep temperature 60–70°F and humidity 50–60%
- Fertilize every 2 weeks (soil) or monitor nutrients weekly (hydroponics)
- Harvest outer leaves at 35 days for continuous supply
- Replant every 2 weeks for uninterrupted harvests