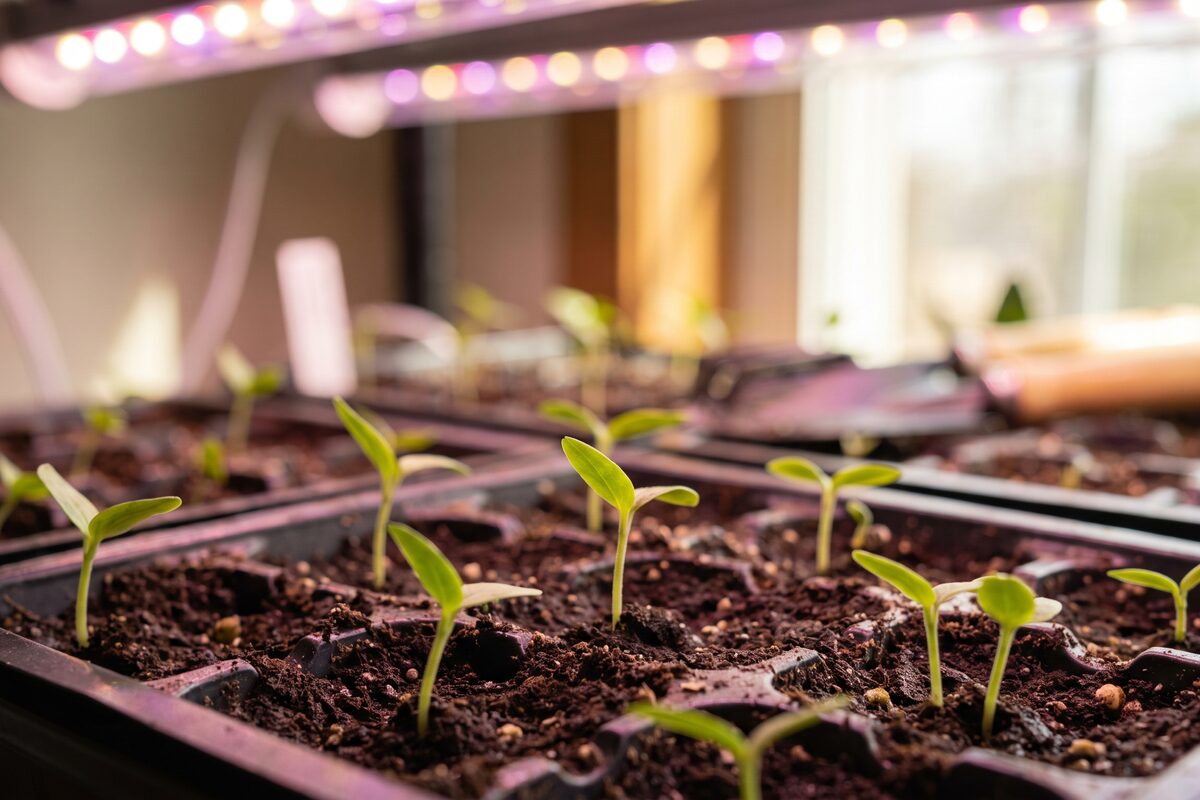
Late summer is the hidden sweet spot for indoor seed starting. While everyone else is winding down their gardens, smart growers are firing up trays of fall herbs, winter greens, and cool-season vegetables — ready to transplant or grow straight through to the first frost. The difference between leggy, pale seedlings and stocky, vigorous transplants almost always comes down to one thing: light.
Seedlings need a different kind of light than mature fruiting plants. Get the spectrum, intensity, distance, and duration right from the start, and you will avoid the two most common beginner mistakes — stretching (too little light) and burning (too much, too close). This guide breaks down exactly what seedlings need and which lights deliver it.
Use code WINDOWHARVEST for 10% off all Click & Grow Smart Gardens.
The discount applies automatically through our affiliate links, or enter the code manually at checkout.
What Seedlings Actually Need From Light
Spectrum: Blue-Heavy for Compact, Healthy Growth
Light spectrum is measured in Kelvin (color temperature) and nanometers (wavelength). For seedlings and vegetative growth, blue light in the 400–500 nm range is the key driver. Blue wavelengths regulate cell elongation — more blue light means shorter, thicker internodes and stockier stems. That is exactly what you want before transplanting. A color temperature of 5,000–6,500K is the sweet spot for seed starting. Lights in this range appear cool white to the eye and deliver a blue-heavy spectrum that discourages stretching.
Red light (600–700 nm) matters more for flowering and fruiting. Some red is fine during propagation — full-spectrum lights designed for edibles include a balanced mix — but if you are choosing a dedicated seedling light, prioritize a high color temperature over a "bloom" or "flower" spectrum.
Intensity: Lower Than You Think
Seedlings are sensitive. They do not need — and often cannot handle — the same intensity as established plants. Measured in PPFD (micromoles per square meter per second), most seedlings thrive between 100–300 µmol/m²/s during germination and early growth. That is significantly less than the 400–600+ µmol/m²/s needed for mature leafy greens or the 600–900+ required for fruiting crops.
Running a high-powered grow light at full blast two inches above a seedling tray is a recipe for bleaching and stress. Most T5 strips and clip lamps designed for propagation hit the right intensity range at the recommended distance without any adjustment. Panel lights like the VIPARSPECTRA need to be dimmed or raised significantly when used for seedlings.
Distance: The Most Common Variable
Distance between the light and the seedling canopy determines how much of that spectrum and intensity actually reaches the plant. General guidelines based on light type:
- T5 fluorescent or LED strip lights: 2–4 inches above the seedling canopy. These are low-intensity by design, so keeping them close maximizes their effect without risk of burning.
- LED panel lights (higher wattage): 18–24 inches or more, and dimmed to 25–50% output for seedlings. Check manufacturer recommendations — they vary significantly by model.
- Clip lamps and small LEDs: 6–12 inches, adjusted based on how the seedlings respond. If they stretch toward the light, move it closer. If leaves show bleaching or curling, raise it.
The inverse square law applies to light: doubling the distance quarters the intensity. Small adjustments make a large difference, so check your seedlings daily for the first week.
Duration: 16 Hours Per Day for Seedlings
Seedlings lack the mature root systems to support rapid growth, but they benefit from long photoperiods to accumulate enough energy for strong early development. The standard recommendation from most university extension services is 14–16 hours of light per day for seedlings started indoors, with 8–10 hours of darkness. A timer is not optional — it is essential. Consistent light cycles regulate plant hormones, and irregular schedules cause stress even in young seedlings.
T5 LED Strips: The Standard for Seed Starting
T5 LED strips have replaced fluorescent T5s as the go-to tool for propagation benches. They run cool, consume little electricity, produce the right color temperature for seedlings, and are easy to mount directly above trays. Their low-profile design lets you keep them close to the canopy — which is exactly where they perform best.
The Barrina T5 LED grow light strips are a well-regarded option among home seed-starters and small-scale propagators. They run at a full-spectrum output with a color temperature suited for vegetative growth and seedling development. The linked-strip design lets you daisy-chain multiple units across a shelf or rack, which is practical when you are running multiple trays. They mount under shelves with included clips or hanging hardware and stay close to your seedlings without risk of heat damage.
→ Check Barrina T5 LED Strips on Amazon
Clip Lamps: Flexible and Beginner-Friendly
Not everyone has a dedicated seed-starting shelf. If you are working with a windowsill, a small table, or a single tray on a counter, a clip lamp gives you flexibility to position light exactly where you need it without installing anything. The adjustable gooseneck design is particularly useful when you want to angle light over a specific section of a tray or follow seedling growth as trays move.
The GooingTop clip grow lamp offers dual gooseneck arms with a full-spectrum LED head. The clip design attaches to the edge of a shelf, table, or tray rack, and the flexible arms let you dial in distance and angle. For a single flat of seedlings or a small herb propagation setup, this kind of light offers solid coverage without committing to a full rack system. It works equally well for growing herbs indoors with grow lights once seedlings are established.
→ Check GooingTop Clip Lamp on Amazon
Scaling Up: Panel Lights for Serious Propagators
If you are starting enough seeds to fill a full growing rack — multiple trays of vegetables, herbs, or growing microgreens indoors — a higher-output LED panel gives you the coverage and adjustability to grow from seedling through full maturity without swapping lights. The trade-off is that you need to manage intensity carefully during the seedling stage.
The VIPARSPECTRA dimmable LED panel includes a dimmer function that makes it usable for seedlings at lower output settings, then scalable to full power as plants mature. The daisy-chain capability means you can expand coverage as your operation grows. This is overkill for a single 1020 tray but makes sense if you run a continuous propagation setup or transition seedlings to an indoor grow tent for their full life cycle. See our guide to the best grow lights for edible plants for a full breakdown of panel options.
→ Check VIPARSPECTRA LED Panel on Amazon
The All-in-One Option: Skip the Setup Entirely
If you want to start seeds without building a light setup, the Click & Grow Smart Garden 3 is worth considering. It is a self-contained pod system with a built-in LED grow light calibrated specifically for plant growth, an automatic watering reservoir, and a soil-free growing medium. You do not set distances, choose spectrums, or manage timers — the system handles all of it. It is not designed for starting transplants at scale, but for growing herbs, greens, and small vegetables from seed to harvest on a kitchen counter, it removes almost every friction point.
→ Check Smart Garden 3 on Click & Grow
Supporting Your Seedlings: Beyond the Light
What to Grow First
Broccoli is one of the best fall seed-starting crops — it germinates quickly, develops fast under lights, and produces in cool weather. Nature Jim's broccoli sprouting seeds are food-grade, high germination rate, and work equally well for full seedling propagation or sprouting directly in a sprouting tray. Getting a tray going now means transplant-ready seedlings in 4–6 weeks.
→ Check Broccoli Sprouting Seeds on Amazon
Growing Medium and Trays
If you are doing a hydroponic or soil-free propagation setup, a quality growing mat makes a significant difference in early root development. The Yuanwovv hydroponic microgreens mat is designed for soil-free cultivation — it holds moisture evenly across the tray, provides a stable surface for root anchoring, and works well for both microgreens and seedling propagation. Consistent moisture is especially important in the first week after germination, when seedlings are most vulnerable to drying out.
→ Check Hydroponic Seed Mat on Amazon
For sprouting directly — without soil or medium — a dedicated sprouting system simplifies the process considerably. The soil-free sprouter provides tiered trays with drainage, making it easy to rinse and maintain sprouts without mess or specialized equipment.
→ Check Sprouting System on Amazon
Humidity
Indoor air in late summer and fall can dry out quickly, especially when grow lights run for 16 hours a day. Seedlings prefer relative humidity in the 50–70% range during early germination. A compact humidifier near your propagation setup helps maintain consistent moisture levels without daily misting. The LEVOIT humidifier is a popular choice for small grow spaces — it runs quietly, has auto shut-off when the reservoir is empty, and does not produce heat that could stress seedlings.
→ Check LEVOIT Humidifier on Amazon
Water pH
Whether you are watering seedlings in soil or running a hydroponic propagation system, pH affects nutrient availability from the very first watering. Most seedlings prefer a pH between 6.0 and 7.0 in soil, or 5.5 to 6.5 in hydroponic media. The General Hydroponics pH Control Kit includes pH Up, pH Down, and a test solution — everything you need to check and adjust your water before it touches seedling roots. This is especially important if your tap water is significantly alkaline or acidic, which is common in many municipal water supplies.
→ Check General Hydroponics pH Kit on Amazon
Putting It Together: A Simple Propagation Setup
You do not need a dedicated grow room to start seeds well. A basic setup that works for most home growers:
- One wire shelving rack with T5 strips mounted under each shelf, set to 2–3 inches above the tray surface
- A timer set for 16 hours on / 8 hours off
- 1020 propagation trays with humidity domes for the first week post-germination
- A small humidifier positioned nearby
- pH-adjusted water at every watering
That setup — lights, timer, trays, humidity — is all you need to germinate and grow seedlings through to transplant size. The Barrina strips handle the light, the timer handles consistency, and the humidity dome handles the microclimate during the critical germination window.
If you want the absolute simplest path to fresh seedlings with zero setup, the AeroGarden Sprout is worth a look. It is a hydroponic pod system with a built-in full-spectrum grow light, automated timer, and nutrient delivery — a compact countertop unit that handles everything automatically. It is not a propagation system in the traditional sense, but for small-batch herb and green starting, it removes all the variables.
→ Check AeroGarden Sprout on Amazon
Common Seedling Problems and What Light Has to Do With Them
Leggy, stretched seedlings: The most common sign of insufficient light. Stems grow long and weak reaching toward the light source. Fix it by lowering the light, increasing duration, or switching to a brighter fixture. Once seedlings are leggy, you can bury the stem deeper at transplant for some crops (tomatoes, for example), but prevention is far easier than correction.
Pale yellow or bleached leaves: Usually too much light intensity, especially with high-output LEDs placed too close. Raise the light or dim it. In some cases this is also a symptom of pH imbalance blocking nutrient uptake — check your water pH before assuming the light is the culprit.
Seedlings that fail to thrive: If your light setup seems right but seedlings stall after germination, check humidity, temperature (most seedlings want 65–75°F), and watering frequency. Light is one part of the system — the other variables matter too.
Final Thoughts
Starting seeds indoors under lights is one of the highest-leverage things you can do as a home grower — it extends your season, gives you control over what varieties you grow, and costs far less than buying transplants. The right light does not have to be complicated or expensive. A set of T5 strips on a timer, positioned correctly, will outperform a south-facing window in fall and winter every time.
Get the spectrum right (cool white, 5,000–6,500K), keep it close (2–4 inches for strips), run it long (16 hours daily), and maintain consistent humidity. Do that, and your seedlings will be transplant-ready on schedule, every time.